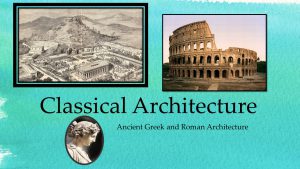
Kids’ Art Salon ~ Classical Architecture
Kids’ Art Salon is in it’s fourth year! To celebrate this milestone AND to pay homage to STEAM 2018, we thought we would focus on architecture. Architecture is the perfect choice for Pasadena’s year of STEAM because it incorporates science, technology, engineering, art and math!
For our fourth and final session of the year, we covered Classical Architecture.
Presentation Highlights
We started with a Powerpoint presentation which discussed Ancient Greek and Roman Architecture. No lesson on Classical Architecture is complete with out a discussion of the three Orders.
DORIC, IONIC & CORINTHIAN
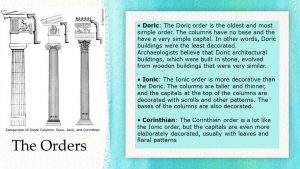
The Greeks and the Romans contributed to so much that has endured in architecture today. It is impossible to cover everything in 20 minutes so we settled for some highlights.
We watched this video clip produced by the Metropolitan Museum of Art in New York. Ella from MetKids gives a great explanation of the differences between the Doric, Ionic and Corinthian columns:
We also discussed the Parthenon in Athens, Greece. No program about Classical Architecture could ignore the Parthenon! This brief video clip gave us a view of what the Parthenon looked like in it’s heyday.
Fun FACT: Many of the buildings in our Nation’s Capitol have Doric and Ionic columns patterned after the Greek Orders! The White House is one example.
Although the Romans were greatly influenced by the Greeks, they contributed their own great architectural and engineering feats. Think aqueducts, arches & domes! And who can discuss Roman Architecture without mentioning the Colosseum. Did you know sea battles took place in the Colosseum? This was made possible by nearby aqueducts that helped flow water into the middle of the stadium. Here is a video clip that explains it’s history:
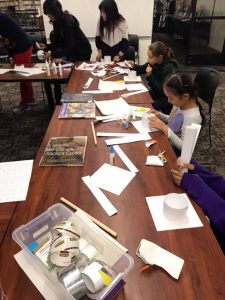
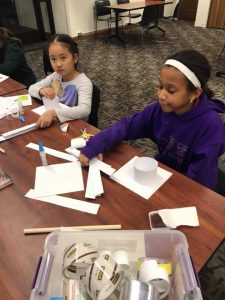
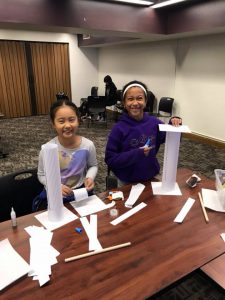
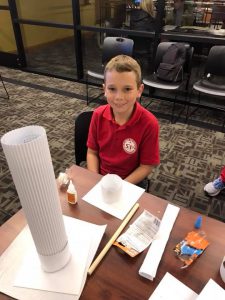
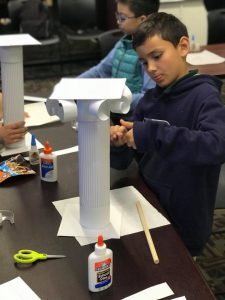
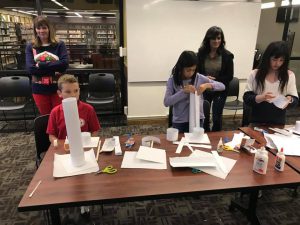
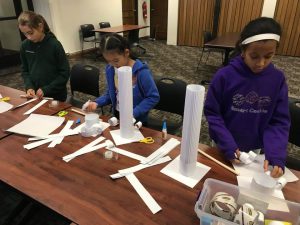
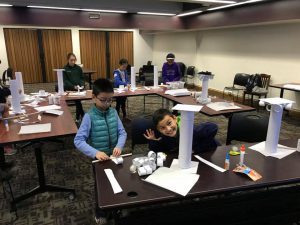
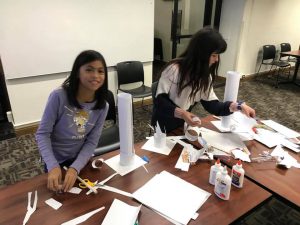
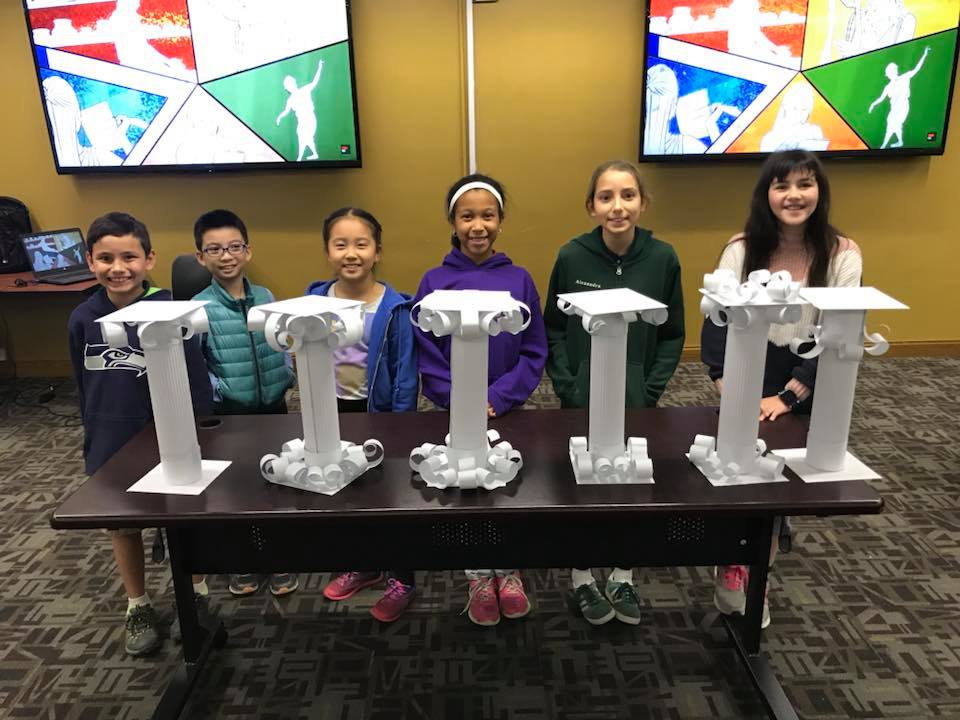
THE PROJECT
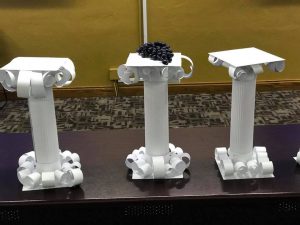
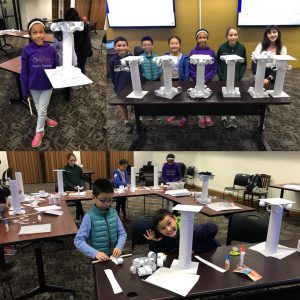
Create a 3-D Corinthian column!
CREDIT: Dick Blick Art Store (copyright 2017)
Corinthian Column
Sturdy enough to use as a pedestal, this classical construction comes apart to reveal a secret inside. (art + history)
Of the three ancient architectural orders originating in Greece, the Corinthian style is the youngest and the most ornate. Named for the ancient city of Corinth, it is characterized by slender, fluted columns with an ornate capital decorated with leaves and scrolls. The earliest example is believed to have appeared in approximately 425 BC at the Temple of Apollo Epicurius.
Adapted by the Romans (with modifications), this classical Greek style was most popular with builders and appeared throughout Europe, Asia, and Africa during the Imperial period. The Romans developed concrete and, though columns were no longer necessary as a functional support for roofs, they continued to appear as a visual symbol of the power, wealth, and influence of the Roman republic.
A stylized version of Corinthian columns can be created in the classroom with a few types of paper. Corrugated paper provides the fluted shaft of the column, and curled white paper quills provide decoration to the capital while, inside the column, there is room for a secret scroll or other hidden treasures.
Materials & Preparation
Corrugated Paper, White, 16″x12″
4 pieces of card Stock, White, 65 lb, 8-1/2″ x 11″
- Cut one piece in half into two 4-1/4″ x 11″ pieces. From those two pieces, cut a 1-1/2″ x 11″ strip and keep the 2-3/4″ wide pieces. Cut the other three into strips approximately 1-1/2″ wide x 11″ long.
14-ply white poster board cut into two 7″x7″ squares (each child will need one square for the base and one for the top or “capital”.
Elmer’s or Gorilla Glue
Scissors
Scotch tape or white Masking Tape
Wooden Dowel Rods (optional)
Instructions:
1. Begin by creating the base and capital. Create a ring by gluing or taping both 4-1/2″ strips (half sheet) of card stock. Run glue along one edge of the ring and place each one in the center of a posterboard square. Allow to dry.
2. To create scrollwork for the capital, take a strip of card stock and hold one end tightly against a dowel rod or pencil, then roll tightly and as evenly as possible to the center of the strip. Release and repeat on the other end of the strip. For the first curls, a piece of masking tape is helpful to hold it in place until the technique is perfected. Curls can roll in either direction — to the front or back of the strip — and can be cut in smaller pieces, if desired.
3. Secure paper curls around the center ring, facing all four sides of the posterboard square. Secure by gluing or taping. Paper clips can be used to hold in place until glue is dry.
4. For the base of the column, cut the 1-1/2″ strips in half to make shorter curls and position them around the ring on all sides.
5. To make the fluted shaft of the column, roll the piece of corrugated paper so the channels run vertically and place it inside the lower ring. Place the capital on top.
Note: for extra strength, apply white tape around the top rim of each ring.
SECRET Stash:
1. The top capital section easily lifts off to reveal an empty space inside the rolled corrugated paper. This is the perfect location for a secret scroll or other hidden treasure.
Meets: National Core Arts Standards – Visual Arts
THE PROCESS